
Quick Start
iRender provides high-configuration servers (machines) to serve people who need to leverage the power of CPUs & GPUs. iRender users can take advantage of our servers for 3D rendering, training AI, VR & AR, simulation, and so on.
We provide remote dedicated servers/machines (both Windows and Ubuntu Linux) for users to completely control via the Microsoft Remote Desktop app. You will set up your working environment (install any version of any software and plugins/addons and use your personal licenses) on our servers and use them as your new workstations to render projects yourself.
So, how to register and use our services?
Use iRender Cloud Rendering services with just a few simple steps and get your project rendered faster.
-
-
-
- Register
- Recharge money
- Transfer files
- Create a new machine
- Boot a machine
- Connect to the remote server
- Shut the server down
- Get the render result
-
-
CONTENTS
- Watch the tutorial video below or read the following instructions:
- Step 1. Download our application
- Step 2. Register
- Step 3. Recharge money
- Step 4. Transfer files
- Step 5. Create a new Machine
- Step 6. Boot a machine
- Step 7. Connect to the remote machine
- Step 8. Shut the machine down
- Step 9: Get the render result
Watch the tutorial video below or read the following instructions:
Step 1. Download our application
You can easily download our iRender GPU application Here. Set it up on your computer.
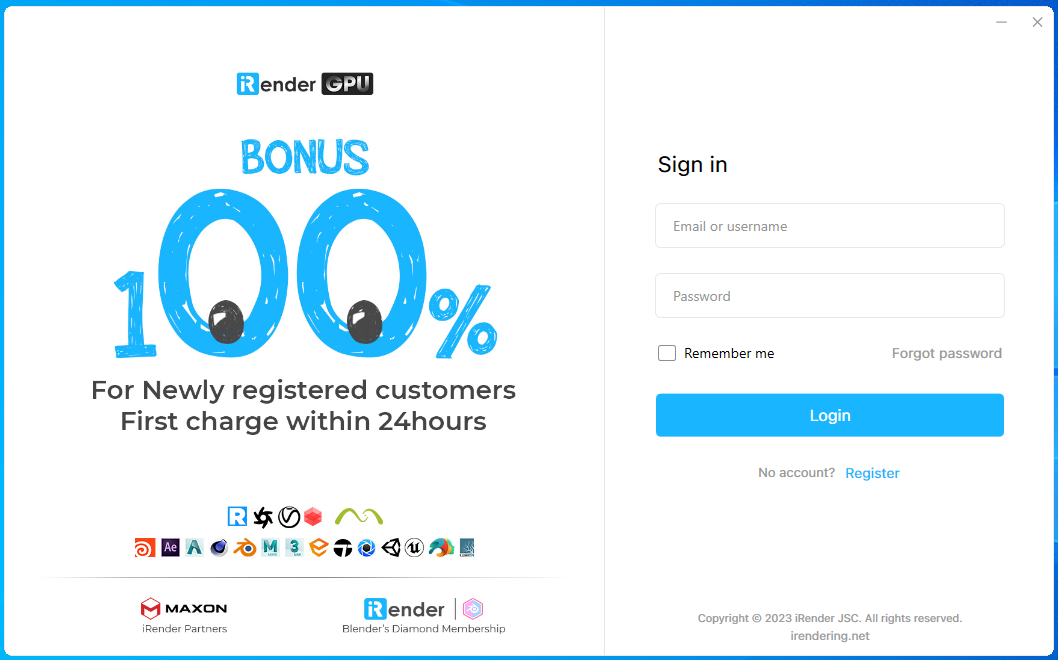
Step 2. Register
Please create an account and verify it via the link sent to your email address. If you don’t receive “Active your iRender-GPUhub Account” mail directly in your Inbox, you should check your “Spam” as well.
Step 3. Recharge money
Log into your iRender account and choose Payment > Payment gateway

- You can pay via OnePay payment gateways with VISA, Mastercard, American Express, etc.
- Momo is more convenient for Vietnamese users.
- You can pay via direct bank transfer.
(Note that the minimum amount to recharge in each transaction is $50.)
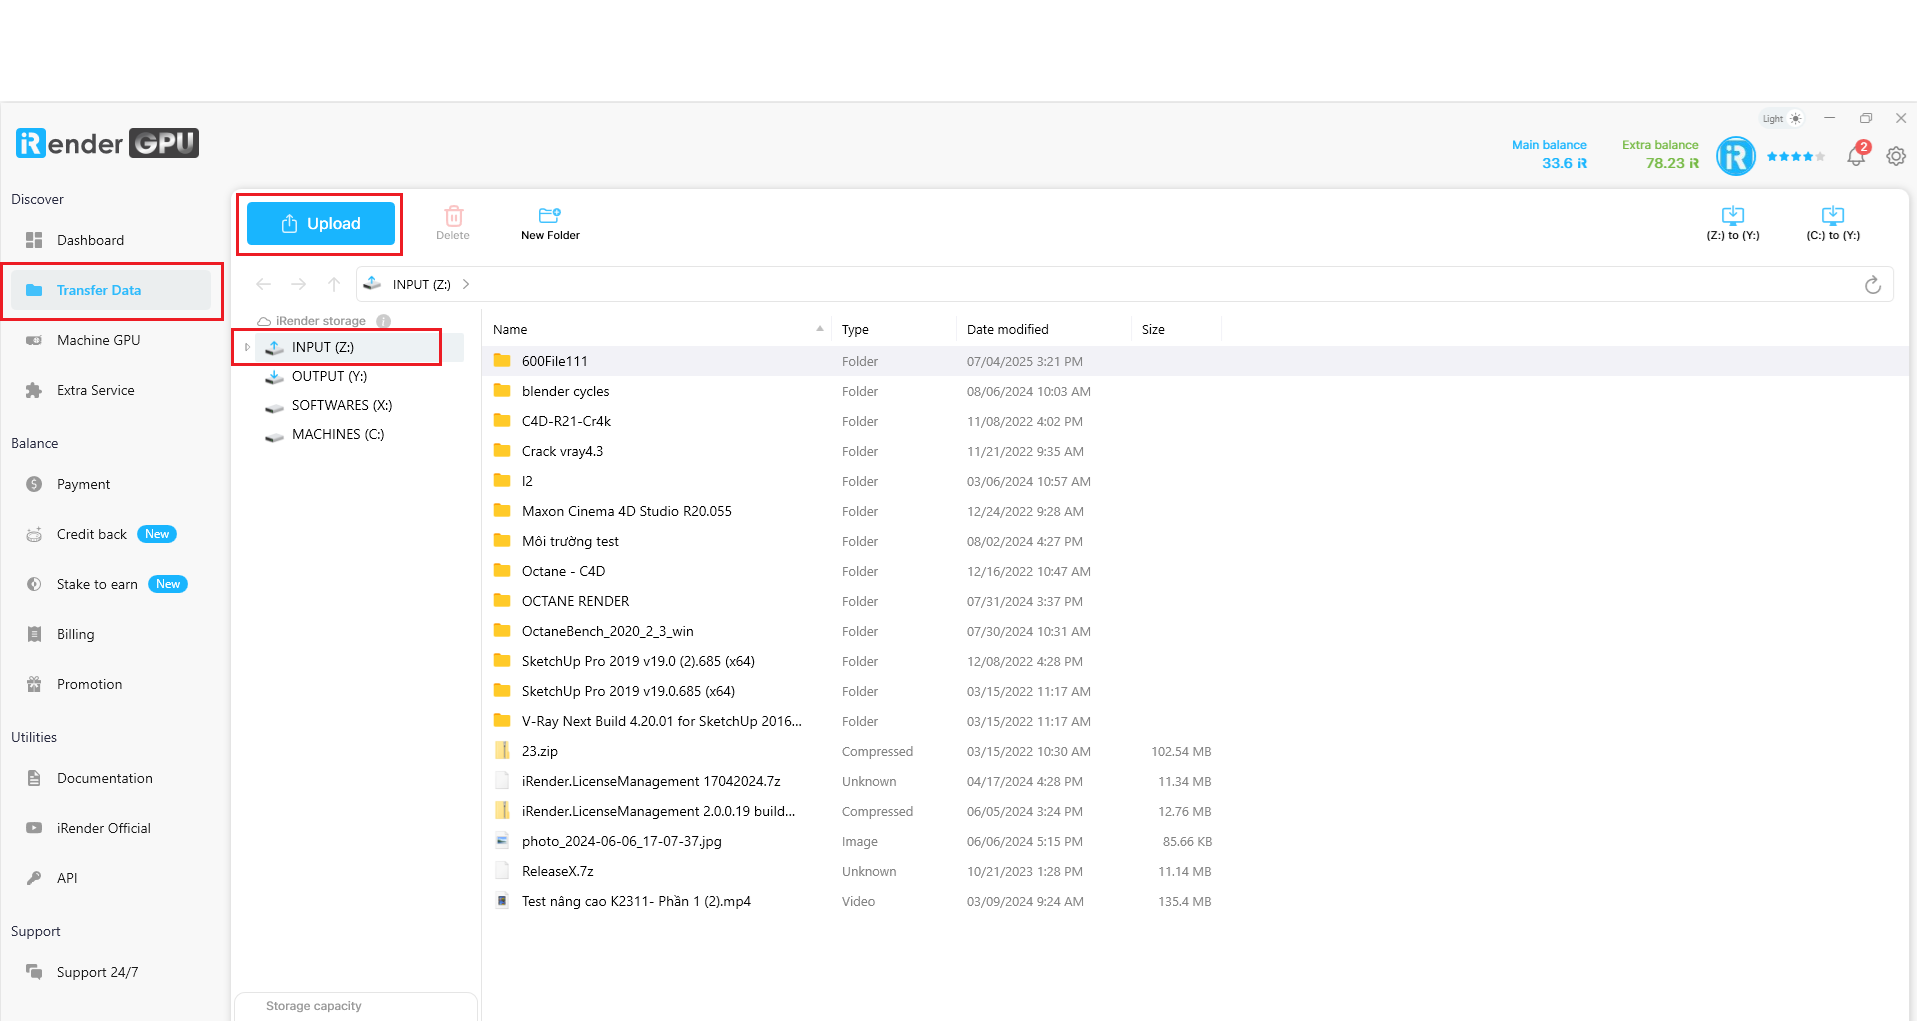
Step 4. Transfer files
To save time and money, transfer your project files from your computer to our remote server before starting the server.
- Go to the Transfer Data tab.
- Select INPUT (Z:) » Upload your files (project files, assets, texture, etc) necessary for the render and software installer (if any) by choosing Upload
Note: We put some installers of common software in an (X:) drive (Read-only) for fast installation time. When connected to our server, copy it from the X drive to C/Desktop and install it. Using different software or versions, you can also upload its installer and your project files to the Z: drive. It will be on our remote servers, and you can install your software faster.
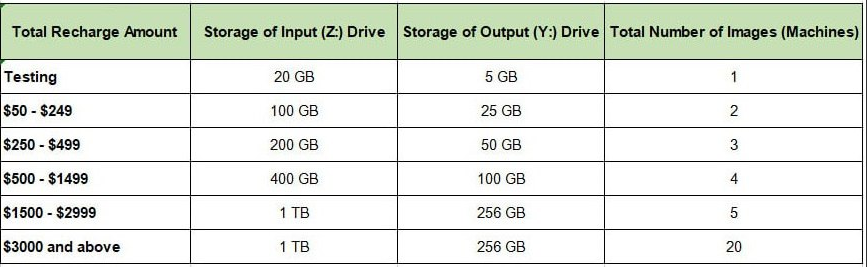
The table below shows the iRender Drive app storage to upload your project files (input) and rendered result files (output). You don’t have to pay for this storage, it’s given to you for free to use based on the total recharge amount you have deposited to your iRender account. The more total recharge amount, the more storage you will get.
If you need more, don’t hesitate to contact us.
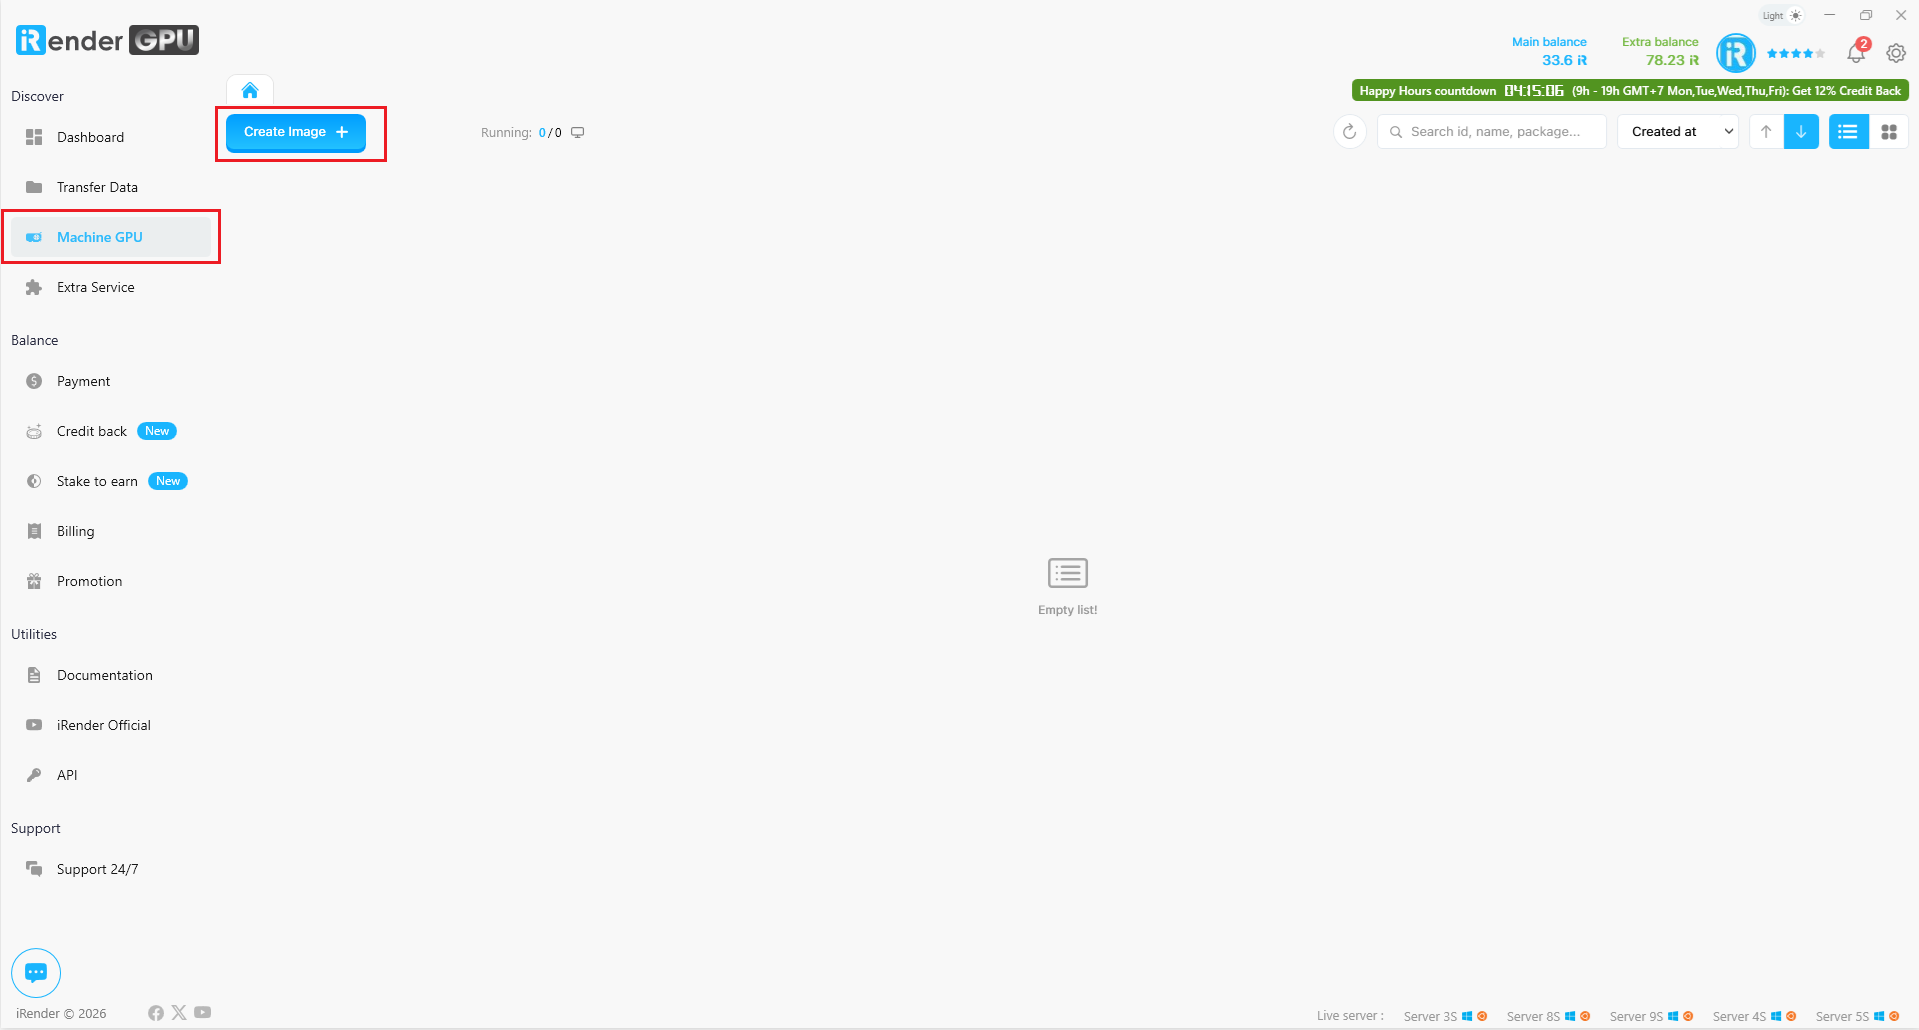
Step 5. Create a new Machine
The machine in the Machine GPU section stores your working environment (installed software and saved data) in our cloud system. iRender provides single to multiple GPU servers. Depending on your demand regarding the purpose of 3D rendering or AI training, the use of software & plugins, and the project scale, you should choose the suitable server package.
- Go to Machine GPU section > Create machine.
2. Select a configuration package you want to use and click the Continue button.
3. Naming your machine, choose the OS type and software installed you want, and click the Confirm button.

Step 6. Boot a machine
After creating a new machine, you click “Boot ”.

Here we offer you two choices.
- Pay as you go
2. Rental Plan
Usually, booting a machine takes about 10-15 minutes. This booting time relies on your machine size, and everything you have on our server, including installed software, saved data, etc. The more the size, the more time it will take to start.
Step 7. Connect to the remote machine
After your machine is booted successfully, your user interface will appear with a CONNECT icon (our system starts charging you from this step).

You should click CONNECT to connect to our remote server immediately.
This is the screen display after you click the Connect icon, the most potent gateway will always appear as default.
A tip for you to automatically connect to the best gateway by go to the setting icon beside your avatar and check to check box “Automatically connect to the best remote desktop gateway.”
Here you are! You’re on our remote server! You will take complete control of it, using it is the same as using your PC. As we suggest, you can install any software you want on this remote server and install it ONLY ONCE. Your working environment will be saved after each session of use. Therefore, you won’t have to re-install anything the next time you use it.
Now, set up your working environment (installing software and transferring your licenses) and start rendering.
All the uploaded files to our iRender Drive app will be on the (Z:) drive. However, Z is just a network/virtual drive for transferring files. Working directly on this drive can cause problems. Therefore, you will have to copy all of the files to the hard drive (Desktop/C:), then do everything (installing software, opening project files, saving output, and rendering) for stable rendering and avoiding network-related issues.
Tips: To ensure your software license is safe, deactivate your license key when you finish rendering and stop using our server.
Step 8. Shut the machine down
After rendering on the server, move your result files from C: drive/Desktop to the OUTPUT (Y:) drive. These files will be synced to the Y drive of the iRender Drive app installed on your local computer.
After that, you must press the red Shutdown button on the machine to stop our system from charging.
If you want to shut down your remote server at a specific time, click the “Scheduler” to schedule the shutdown time.

Important note: Our system stops charging you only when you press this red “Shutdown” button.
Step 9: Get the render result
Choose the Transfer Data tab and download the result files from the OUTPUT (Y:) drive.
Note that the storage capacity of the OUTPUT (Y:) drive is one-quarter of that of the INPUT (Z:) drive.
If you have any questions, please don’t hesitate to contact our 24/7 Support Team.
