
Must-know tips for better using iRender services
C drive is a hard drive while Z and X drives are network drives. C drive is to perform heavy tasks that require high computing performance, such as rendering, training Deep Learning models, etc. Meanwhile, Z drive, synced with iRender Drive/GpuHub_Sync, is to transfer files. X drive contains common software installers.
There are some useful tips for using C, Z, and X drives on iRender remote servers.
CONTENTS
1. Upload data to iRender Drive/iRender GPU before booting
It’s suggested to upload the data files to iRender Drive before booting the machine. Depending on the amount of data you upload, it may take a few minutes or longer to sync.
You can check the sync process by clicking the Syncing at the vertical bar on the left side.
- Syncing shows that the folder is being synced to Z drive.
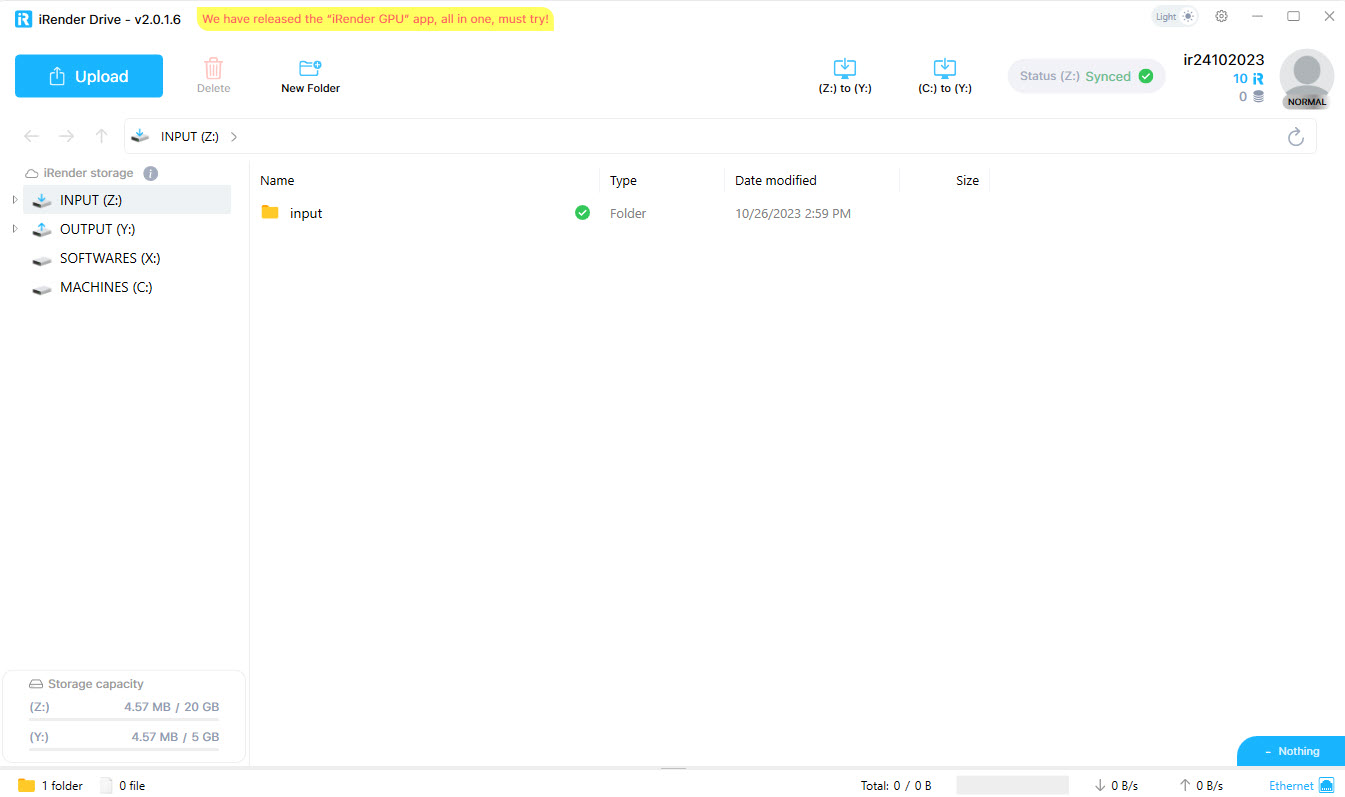
- Synced means the sync process is done. To save your money, you should boot the machine after your data is synced.
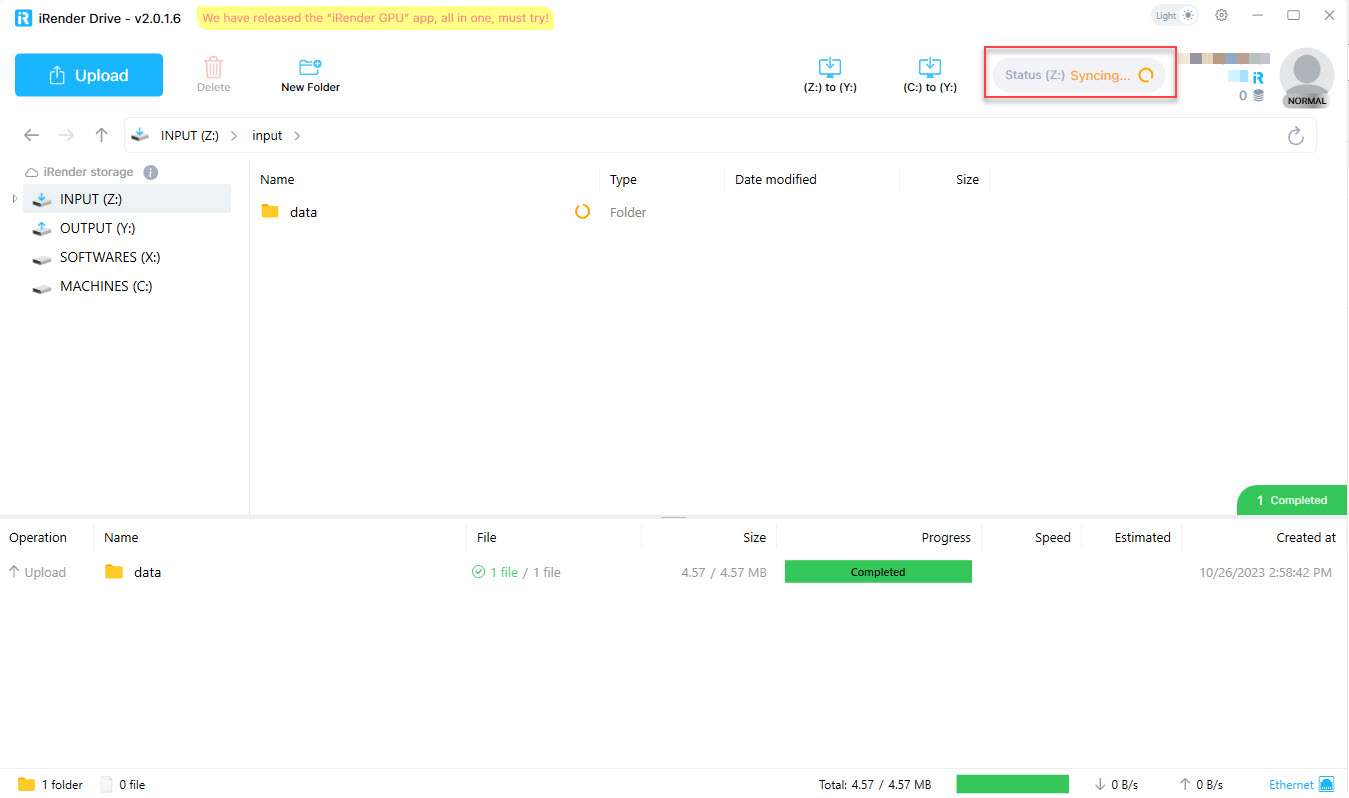

- INPUT (Z:): Upload your data to our servers, please upload your data projects to INPUT (Z:)
- OUTPUT (Y:): You can download the results file in OUTPUT (Y:), please move your output files from the C: drive to the OUTPUT (Y:) drive in iRender machine
- Remember to compress the files in .zip format before uploading them to iRender Drive.
To resolve this (or Solution): Please rename the file or upload it to another folder when re-uploading this file to iRender Drive.
2. Install software on the Desktop or C drive
Always keep in mind that you work everything on hard drives like C or Desktop, instead of network drives like X or Z. You might get installation errors when installing software on X or Z drive.
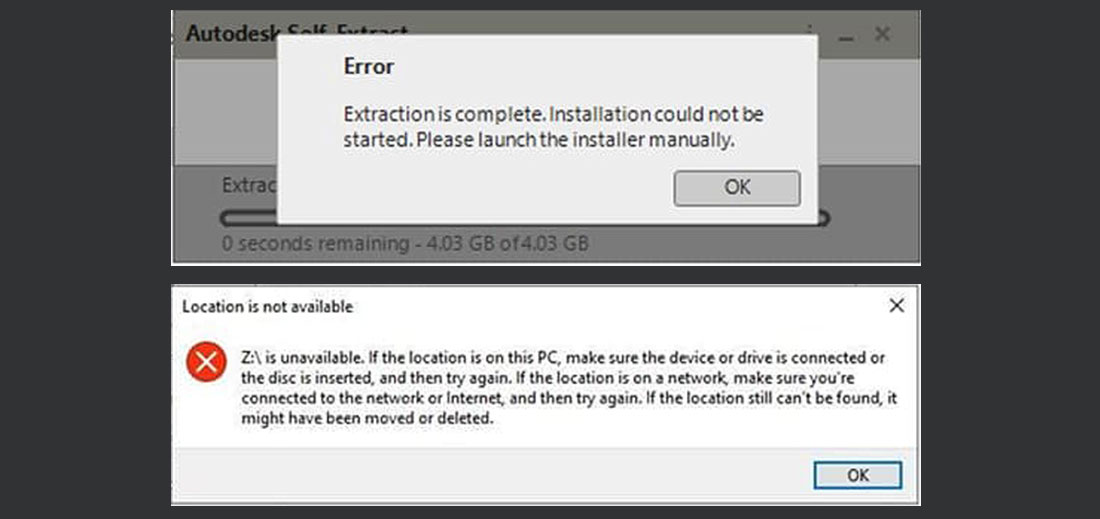
- Most software is not allowed to install via network drives (X or Z drive), so there is a system error.
- As X and Z drives are network drives, so if you open the installer file and install it directly on one of these 2 drives, you will experience a slow opening and a slow or laggy installation.
Solution
- If the installer you need is in X drive, just copy it to Desktop before installing.
- In case you need a different installer, you should transfer it to the remote server by GPU Hub sync. You then copy it from Z drive to Desktop before installing it.
3. Open files from C drive or Desktop
As mentioned above, it’s optimal to work on C drive or Desktop. Opening files from C drive or Desktop can prevent the project from being crashed. If you open the file directly from Z drive, it’s likely to cause a crash due to loss of connection. So, remember to move your file to the Desktop before opening it.
The hard drive (C/Desktop) is better at data recording and transmission speed than the network drive (Z drive). As a result, rendering through C drive is much faster and more stable. It’s highly recommended to prepare the data files to render in C drive or Desktop, instead of Z drive.
Let’s watch the below video to see the huge difference when rendering a project at C drive and Z drive.
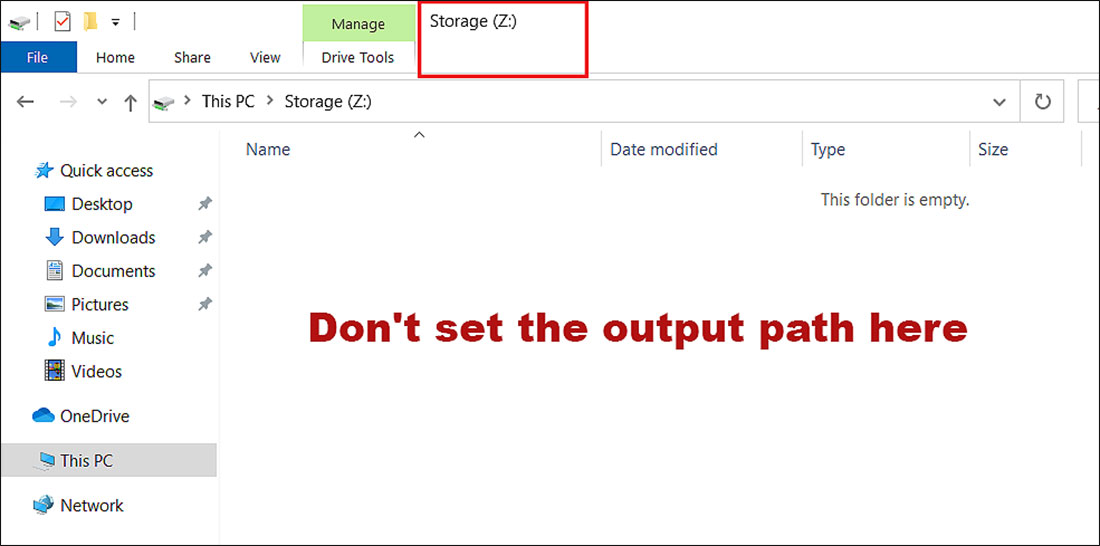
4. Set output path at C drive to avoid data loss
Another tip you need to know is to set the output path on a hard drive like C or Desktop to avoid output data loss.
Imagine when you save the output path directly at a network drive like Z. As a result, the output files of your 3D rendering project may not be saved continuously when there is a temporary loss of connection.
To avoid this unfortunate thing from happening:
- Set the output path at C drive first.
- After rendering, compress the output results in .zip format, then move it from C drive to Z drive. To receive the result, read this guide.
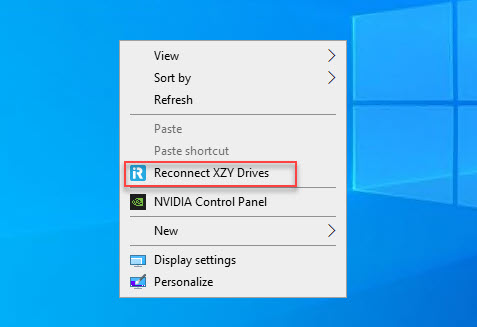
5. What to do when you don’t see enough X, Y and Z drive?
After successfully connecting to the machine, if you don’t see enough X, Y, and Z drives, please follow these steps: right-click on the desktop and select ”Reconnect XZY Drives”
Connecting via Secure Internal Network
