
iRender Drive for MacOS and Linux
In this article, we are very pleased to announcing a new transfer tool.
We are launching an upgrade called iRender Drive based on GPUhub-Sync application. iRender Drive can massively improve the customer experience: easier, faster, and more effective.
Download iRender Drive
1. On the top right of the iRender dashboard, choose Downloads.
2. The iRender software page displays the iRender Drive installer on the MacOS and Linux.
CONTENTS
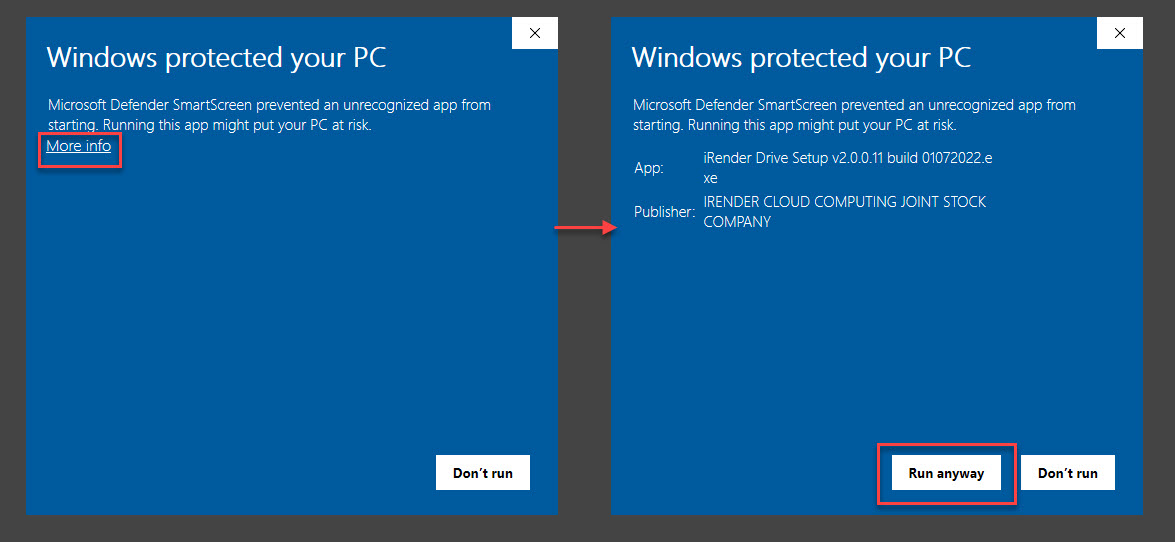
Install iRender Drive
How to use iRender Drive
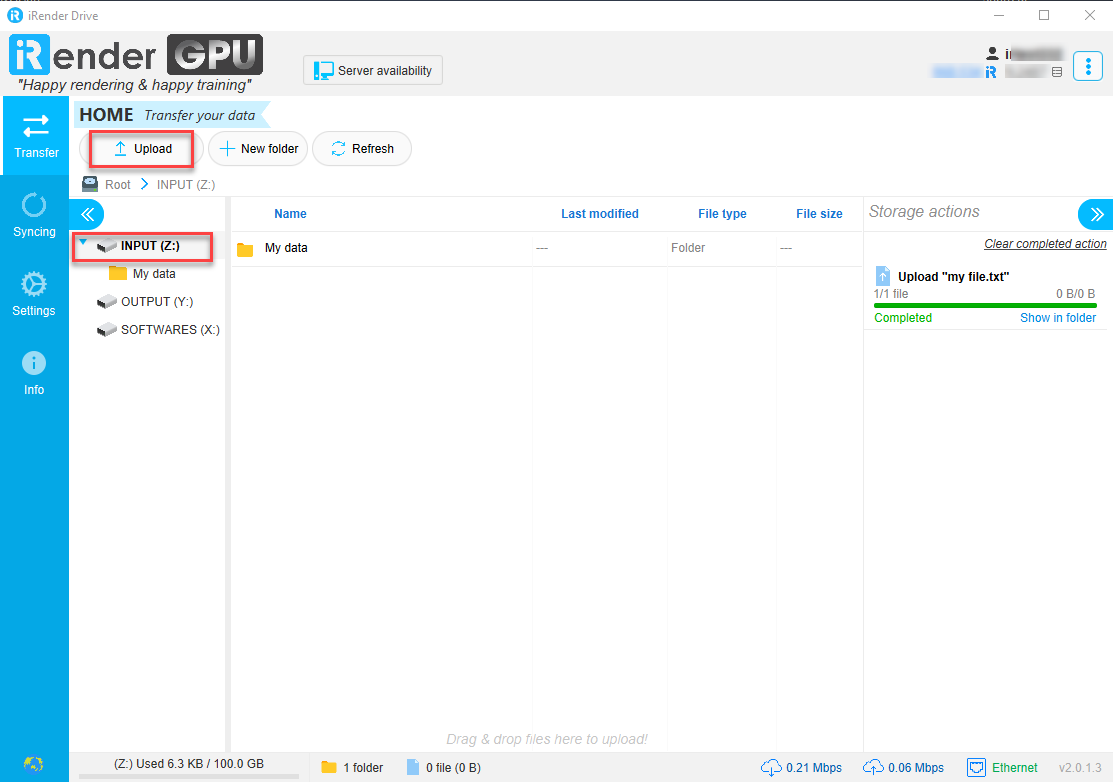
1. Upload data projects to iRender server
We have provided an input drive for you to transfer your data to our server, it is called INPUT (Z:). Please upload your data projects to INPUT (Z:), and it will be automatically synced to the Z drive of the iRender machine.
1.1. Sign in iRender Drive with your iRender credentials.
1.2. Choose INPUT (Z:) » Upload files by choosing Upload or just using Drag and Drop files.
Select Upload: You can choose Upload Folder or Upload File.
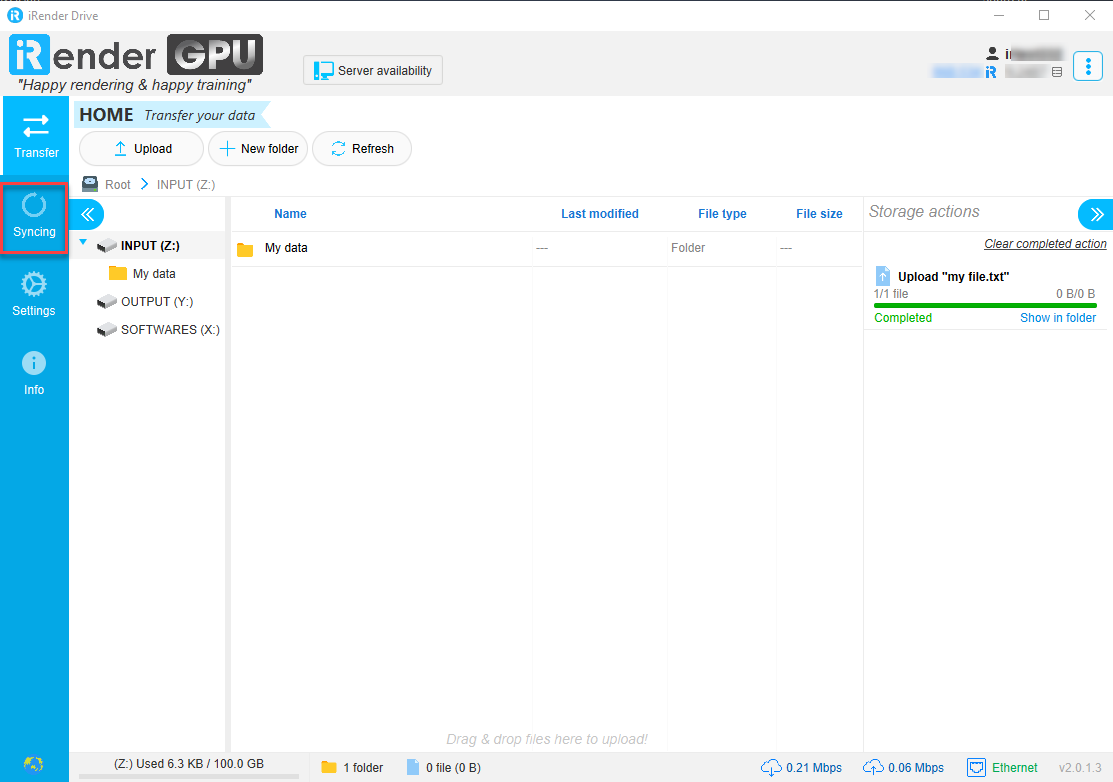
1.3. Wait for the uploaded data to sync to the Z drive
- Syncing shows that the folder is being synced to Z drive.
- Synced means the sync process is done. Your data has been synced to the iRender server.
2. Download files after rendering as described in the Get results step
2.1. Move your output files from C: drive to OUTPUT (Y:) drive in iRender machine. Those files will be synced to iRender Drive app.
You can download the results file in OUTPUT (Y:) drive on the iRender Drive app.
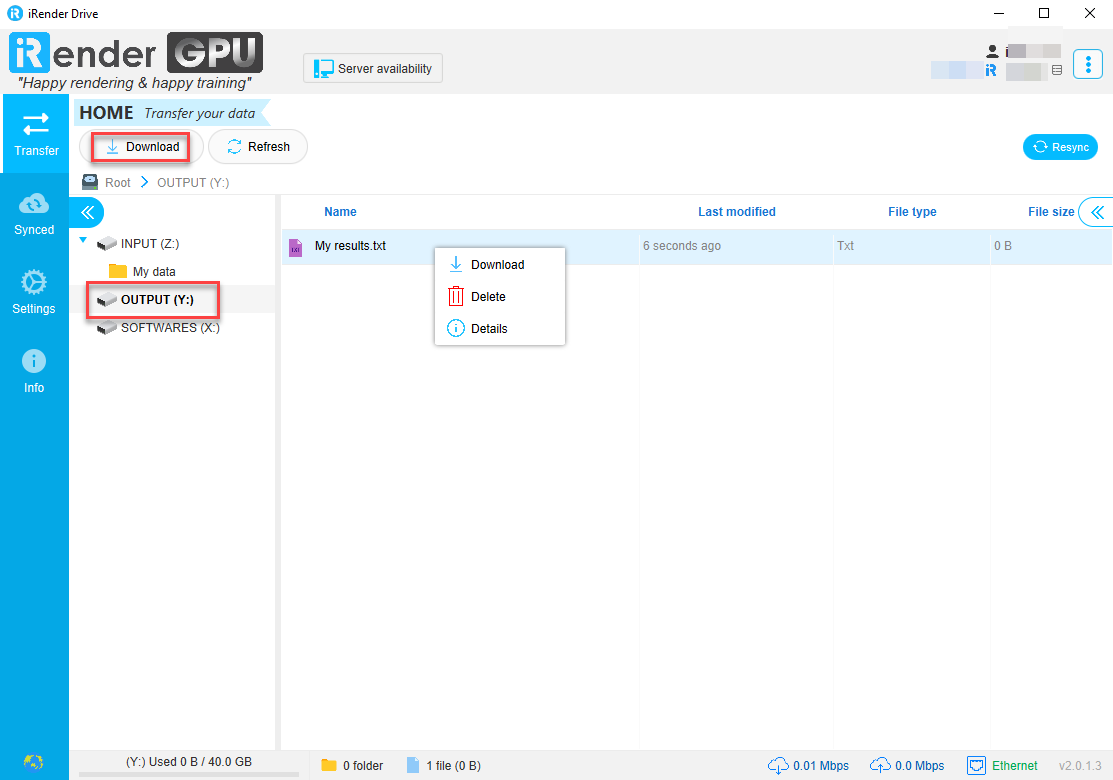
The storage capacity of OUTPUT (Y:) drive is one-quarter of the storage capacity of INPUT (Z:) drive.
Install iRender drive on macOS
