
How to split disk of iRender server in Windows OS
Disk Management is an application to help manage your disk in Windows OS. With Disk Management, you can only shrink the volume first and create a new partition to get more partitions on the hard drive.
To split disk in Windows OS
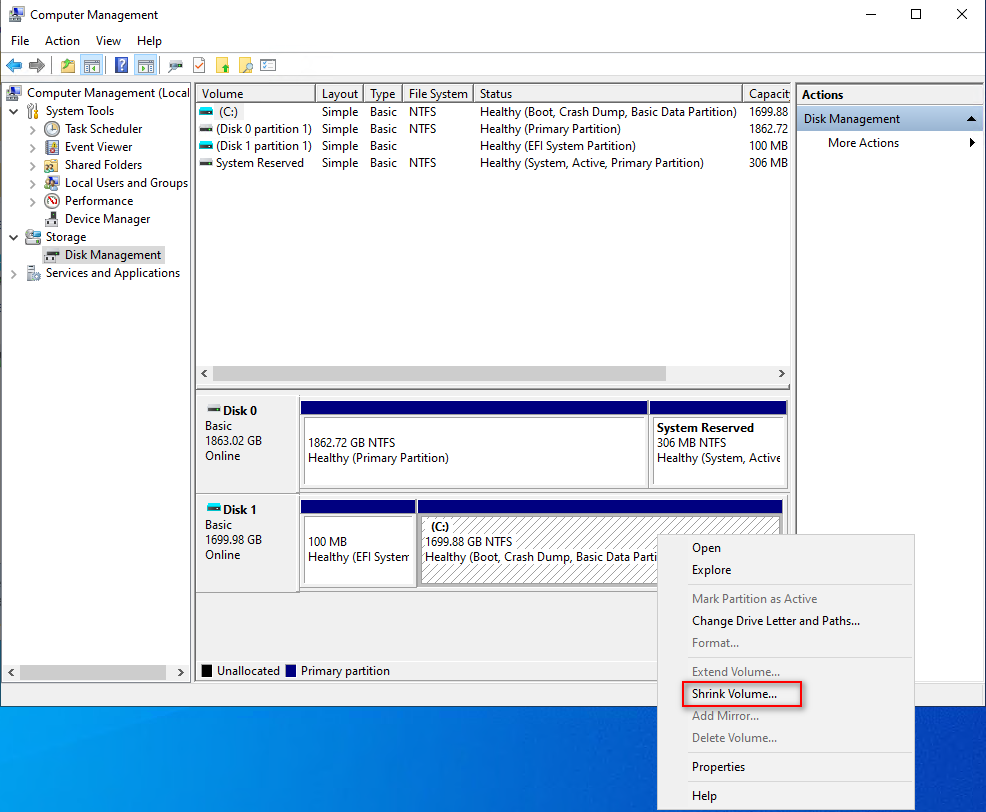
1. Open Disk Management by right-clicking This PC » Manage » Disk Management.
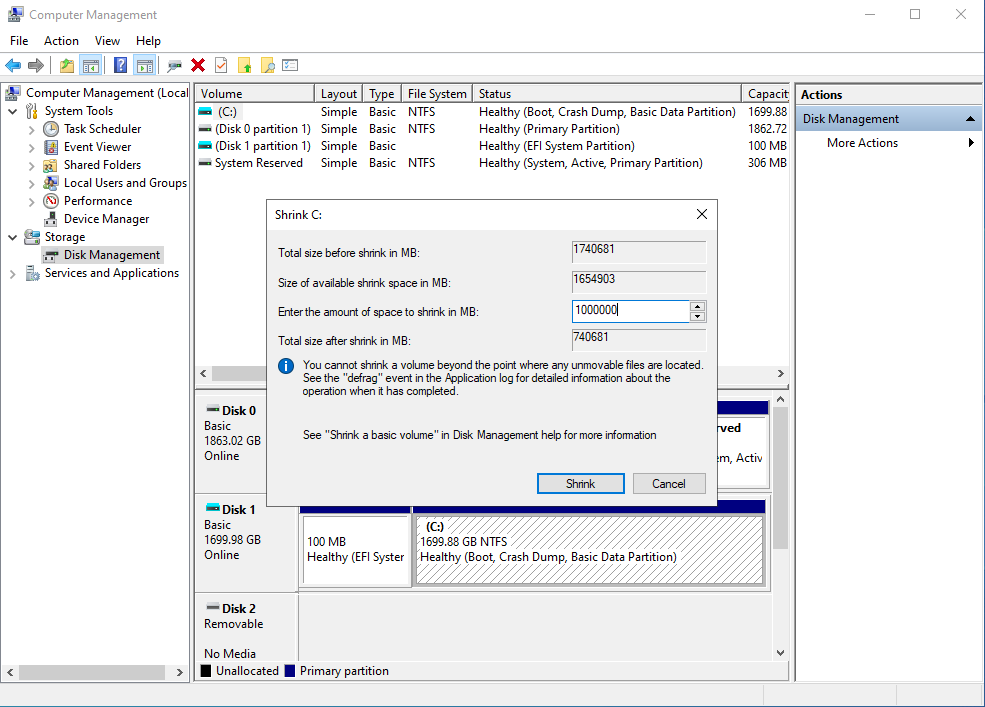
2. Right-click the (C:) disk and select “Shrink Volume“, then you will get an unallocated space.
- Enter the amount of space to shrink in MB » Click Shrink
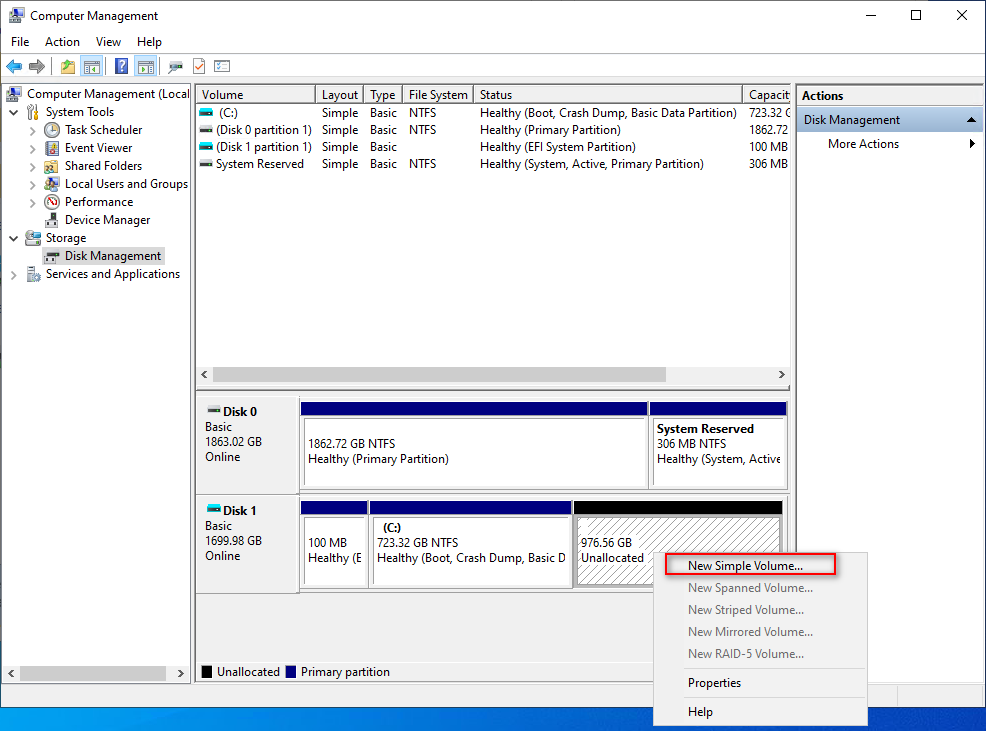
3. Right-click the Unallocated space, and select “New Simple Volume“.
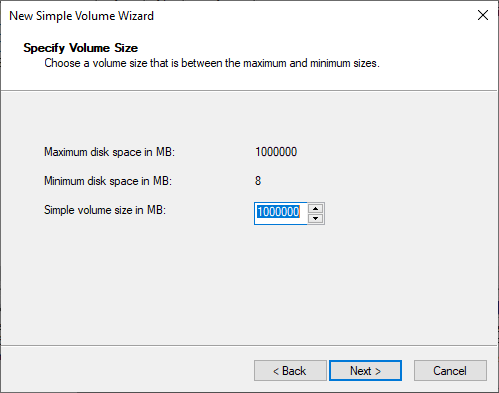
- Enter simple volume size in MB » click Next
- Assign the drive letter, not choose X, or Z letter » Click Next
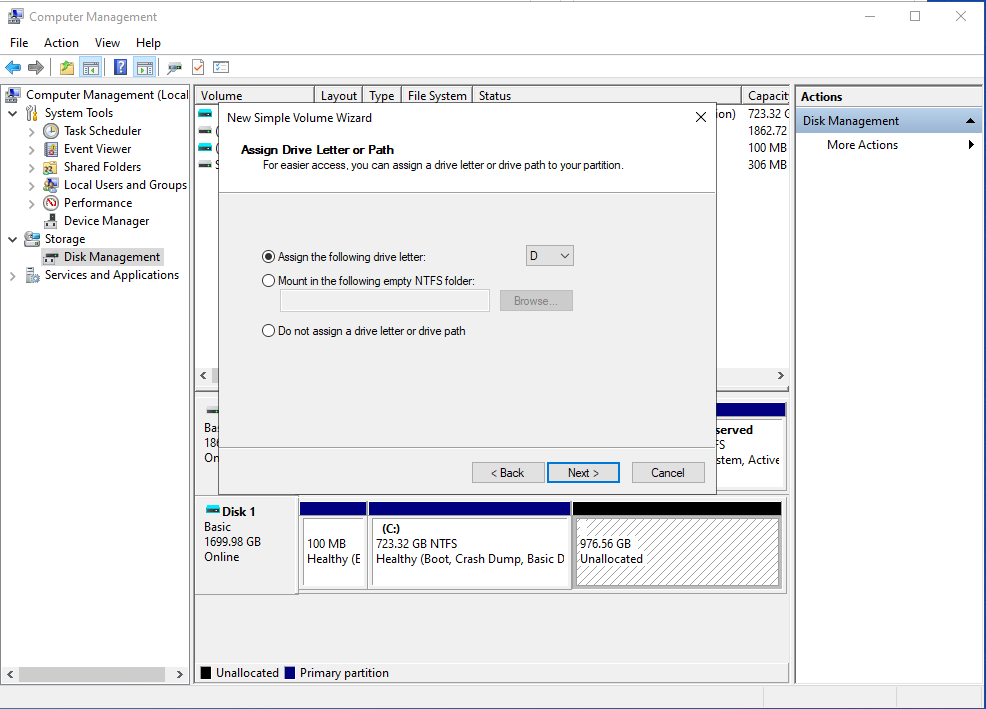
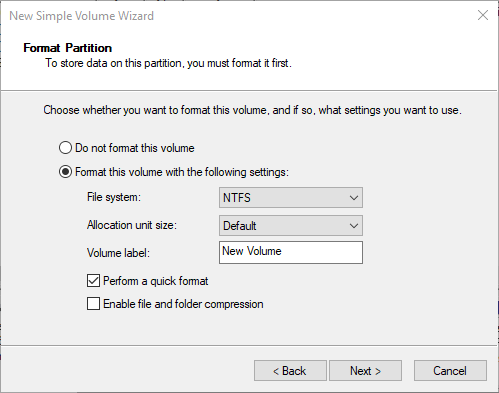
- Enter volume label » Click Next.
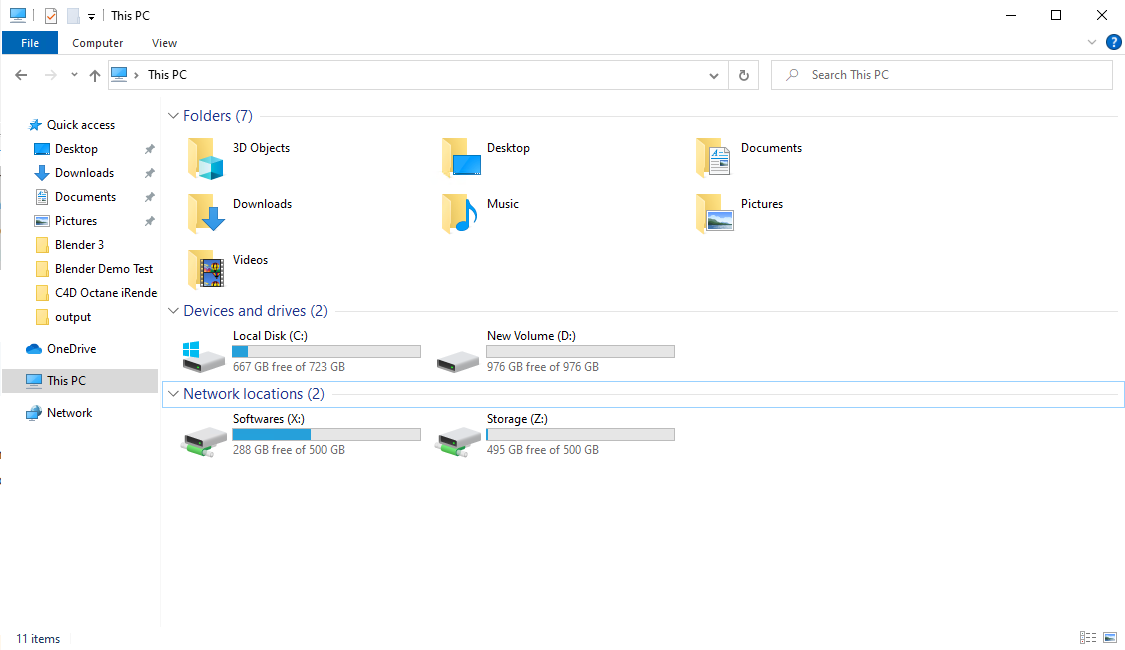
Finally, you will get two partitions on iRender server.
How to use NVLink on iRender server
